placeholder...
Never be without your favourite Boots products with our international delivery options.
Boots has products available in other retail outlets in a number of countries, select from the country-specific sites below to find out more:

health & pharmacy
visit health & pharmacy
health offers
health value packs & bundles
featured brands
vitamins & supplements
medicines & treatments
lifestyle & wellbeing
incontinence
sexual pleasure & wellbeing
women's health
men's health
baby & child health
travel health
mobility & daily living aids
new in health
COVID-19 Information, Products & Testing
reusable & disposable face masks
beauty & skincare
fragrance
baby & child
electrical
sun & holiday
wellness
toiletries
men's
photo
vegan
gift
new in
visit new in
new in beauty & skincare
new in fragrance
new in premium beauty & skincare
new in baby & child
new in baby & kids clothes
new in No7
new in hair
new in wellness
new in electrical
new in health
new in footcare
new in luxury bath & body
new in toiletries
new in diet & weight management
new in photo
brand A-Z
health
visit health
allergy & hayfever
cold & flu
coronavirus (COVID-19)
dental advice
diabetes
fertility & conception
first aid advice
footcare
how does menopause affect sleep?
how to manage the menopause
incontinence
men's health
mental health
quit smoking help
Reusable & disposable face masks
vitamins & supplements
wellness
beauty & skincare
skincare diagnostic tool
self-care at home
baby & child
electrical
sun & holiday
gifting
visit gifting
10 great graduation gifts for her that she’s certain to love
12 of the best baby shower gifts
13 of the best anniversary gifts you can find at Boots
gift inspiration for dads
gift inspiration for her
gift inspiration for him
gift inspiration for mums
how to celebrate Father's Day
how to choose your eyewear with the planet in mind
how to make a spa in a jar
how to wrap the perfect gift
the best Eid gifts you can get at Boots
the Boots guide to the best birthday gifts
the Boots guide to the best first Mother’s Day gifts
the Boots guide to the best home fragrance gift ideas
the Boots guide to the best perfumes for mums
best photo gift ideas
offers
sale
clearance
savings
value packs & bundles
visit value packs & bundles
all value packs & bundles
hair value packs & bundles
health value packs & bundles
toiletries value packs & bundles
baby value packs & bundles
beauty value packs & bundles
premium value packs & bundles
electrical value packs & bundles
men's value packs & bundles
holiday value packs & bundles
bigger packs and sizes
€12 Tuesday
fragrance offers
electrical offers
skincare offers
makeup offers
seasonal events
health offers
baby & child offers
toiletries offers
photo offers
great new price
No7
shop all
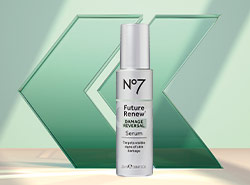
future renew
no7 bestsellers
no7 clearance
new in No7
No7 skincare
visit no7 skincare
future renew
derm solutions
No7 online beauty services
personalised skin
laboratories
protect & perfect
lift & luminate
restore & renew
advanced ingredients
anti-ageing serums
anti-ageing skincare
No7 moisturisers
hydraluminous range
cleanser & toners
masks
retinol range
early defence
Radiance+
makeup
mens
No7 gifts
bath & body
suncare & selftan
tools
online exclusives
no7 advice
visit no7 advice
No7 Get the Look - Perfect the Pout
No7 Get the Look: Line & define
an everyday eye look
a bold evening look
shop the stellar dreams look
shop the ethereal radiance look
shop the star glazing lip look
shop the all day everyday look
shop the all-out glam look
shop the weekend glow look
unstoppable together
Discover your Perfect No7 regime
No7 foundation analysis
No7 Mascaras Explained
find your perfect No7 serum
Discover No7 Advanced Retinol
No7 Laboratories Explained
No7 Line Correcting booster serum
No7 Get the Look: Get the Glow
No7 Beauty How To
No7 Waiting List
no7 beauty services
personalised skin
Unable to process your request
Sorry, we're unable to find stores near that location. Please try again or use a different postcode or place name.